Reverse Provisioning
Overview
In the previous sections, you learnt how to create and deploy deployment unit components such as data product output ports and workloads.
You start from a template in the Builder > Templates section and then fill all the provided fields with both metadata and infrastructure-related information. For instance, an S3 output port template may require the bucket name, folder, and even description, permissions, and so on. After that, you link the component to a parent data product. When you'll trigger the provisioning operations on that data product, a Technology Adapter will be required to deploy the component on the target infrastructure service (e.g. AWS) starting from the information you provided when creating the component on witboost.
Check this section for additional details on the Deploy Flow
Introducing a two-way communication channel
In a standard provisioning workflow, users on witboost define and update the components and their metadata by working on the catalog-info.yaml file in the component's git repository. Specific Provisioners receive instructions to align the target infrastructure based on the content of that file.
However, often developers and data engineers prefer to directly interact with the target infrastructure service. Say you have a table on Dremio and a witboost component that references it. If you want to update the table schema you have two options:
- you update the schema field in the
catalog-info.yamlof the component and trigger a deploy operation. This way, one of the Specific Provisioners will take care of your modifications and update the table on Dremio - you directly update the Dremio table, run your experiments and test queries. Once you are ready, you trigger a reverse provisioning operation on the witboost component to automatically reflect the new changes into the
catalog-info.yaml
Importing the schema definition from the infrastructure service into the witboost component is just one of the possible use cases the Reverse Provisioning feature enables. You could extract billing details, sample data, tags, descriptions, data sharing information, access permissions, and every other kind of metadata the underlying technology can provide.
How it works
Specific provisioners play an important role in the reverse provisioning process. Every (deployable) component on witboost is associated to an infrastructure template id which is used to identify the technology adapter that can interact with the infrastructure service(s) on which the component is physically deployed.
Specific provisioners are microservices usually developed and maintained by the Platform Team which has to:
- define what input parameters the user has to provide before starting a reverse provisioning operation on a component (e.g. endpoints, environment, names, credentials, ...)
- implement the endpoints exposed by the technology adapter to accept user inputs, extract metadata from the target infrastructure services, and return the updates to be applied to the component's
catalog-info.yaml
Once the updates are ready, the user will be presented with a merge tool to compare the old catalog-info.yaml with the new one, apply modifications, download or save the enriched file.
Step-by-step
1. Identify a component on which the Reverse Provisioning feature is enabled
- Head to the component's page (https://
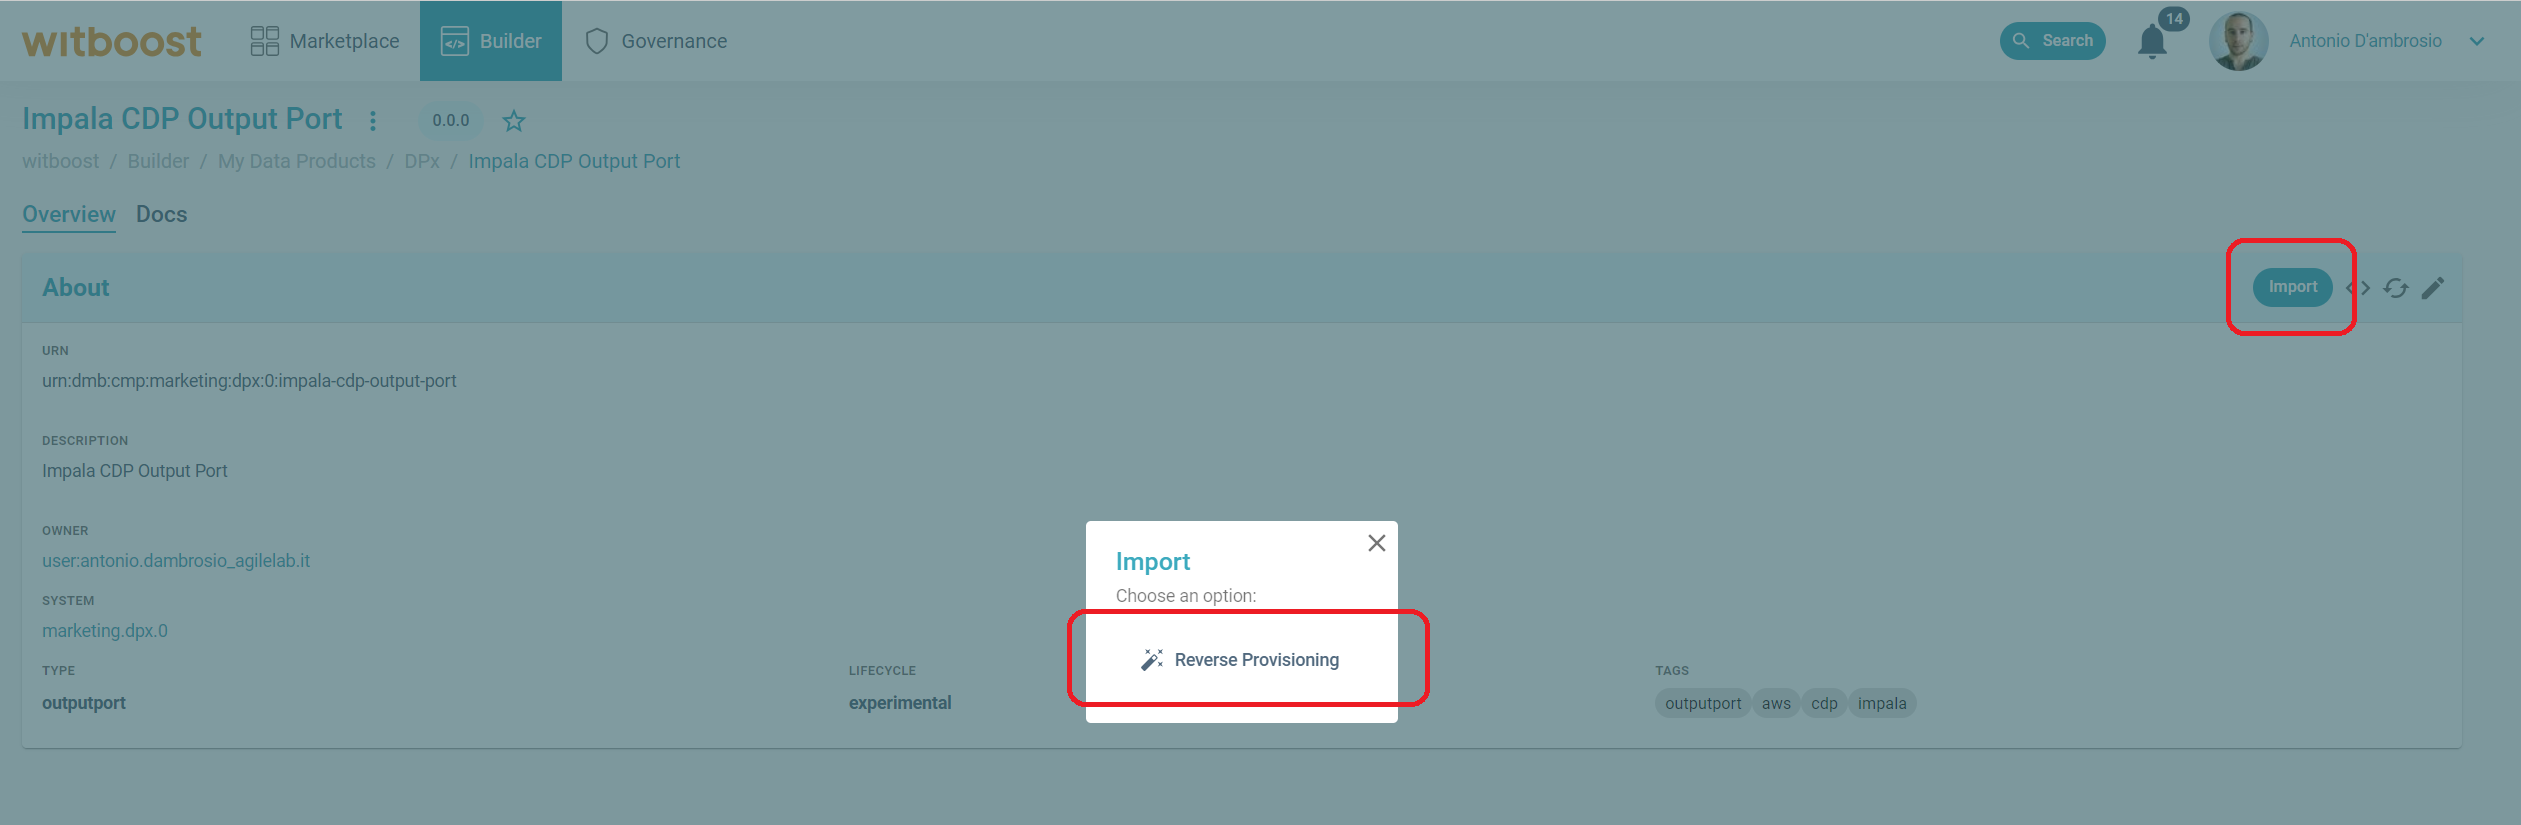
<witboost-url>/catalog/namespace/component/component-id) fromBuilder>My Data Products> Click on a Data Product > Click on one of its components. Alternatively, you can search the Software Catalog (Builder>Software Catalog) - Click on the
Importbutton - An import dialog will open and, when the Reverse Provisioning is enabled on the component, the
Reverse Provisioningoption will be clickable and will redirect you to the Import Wizard
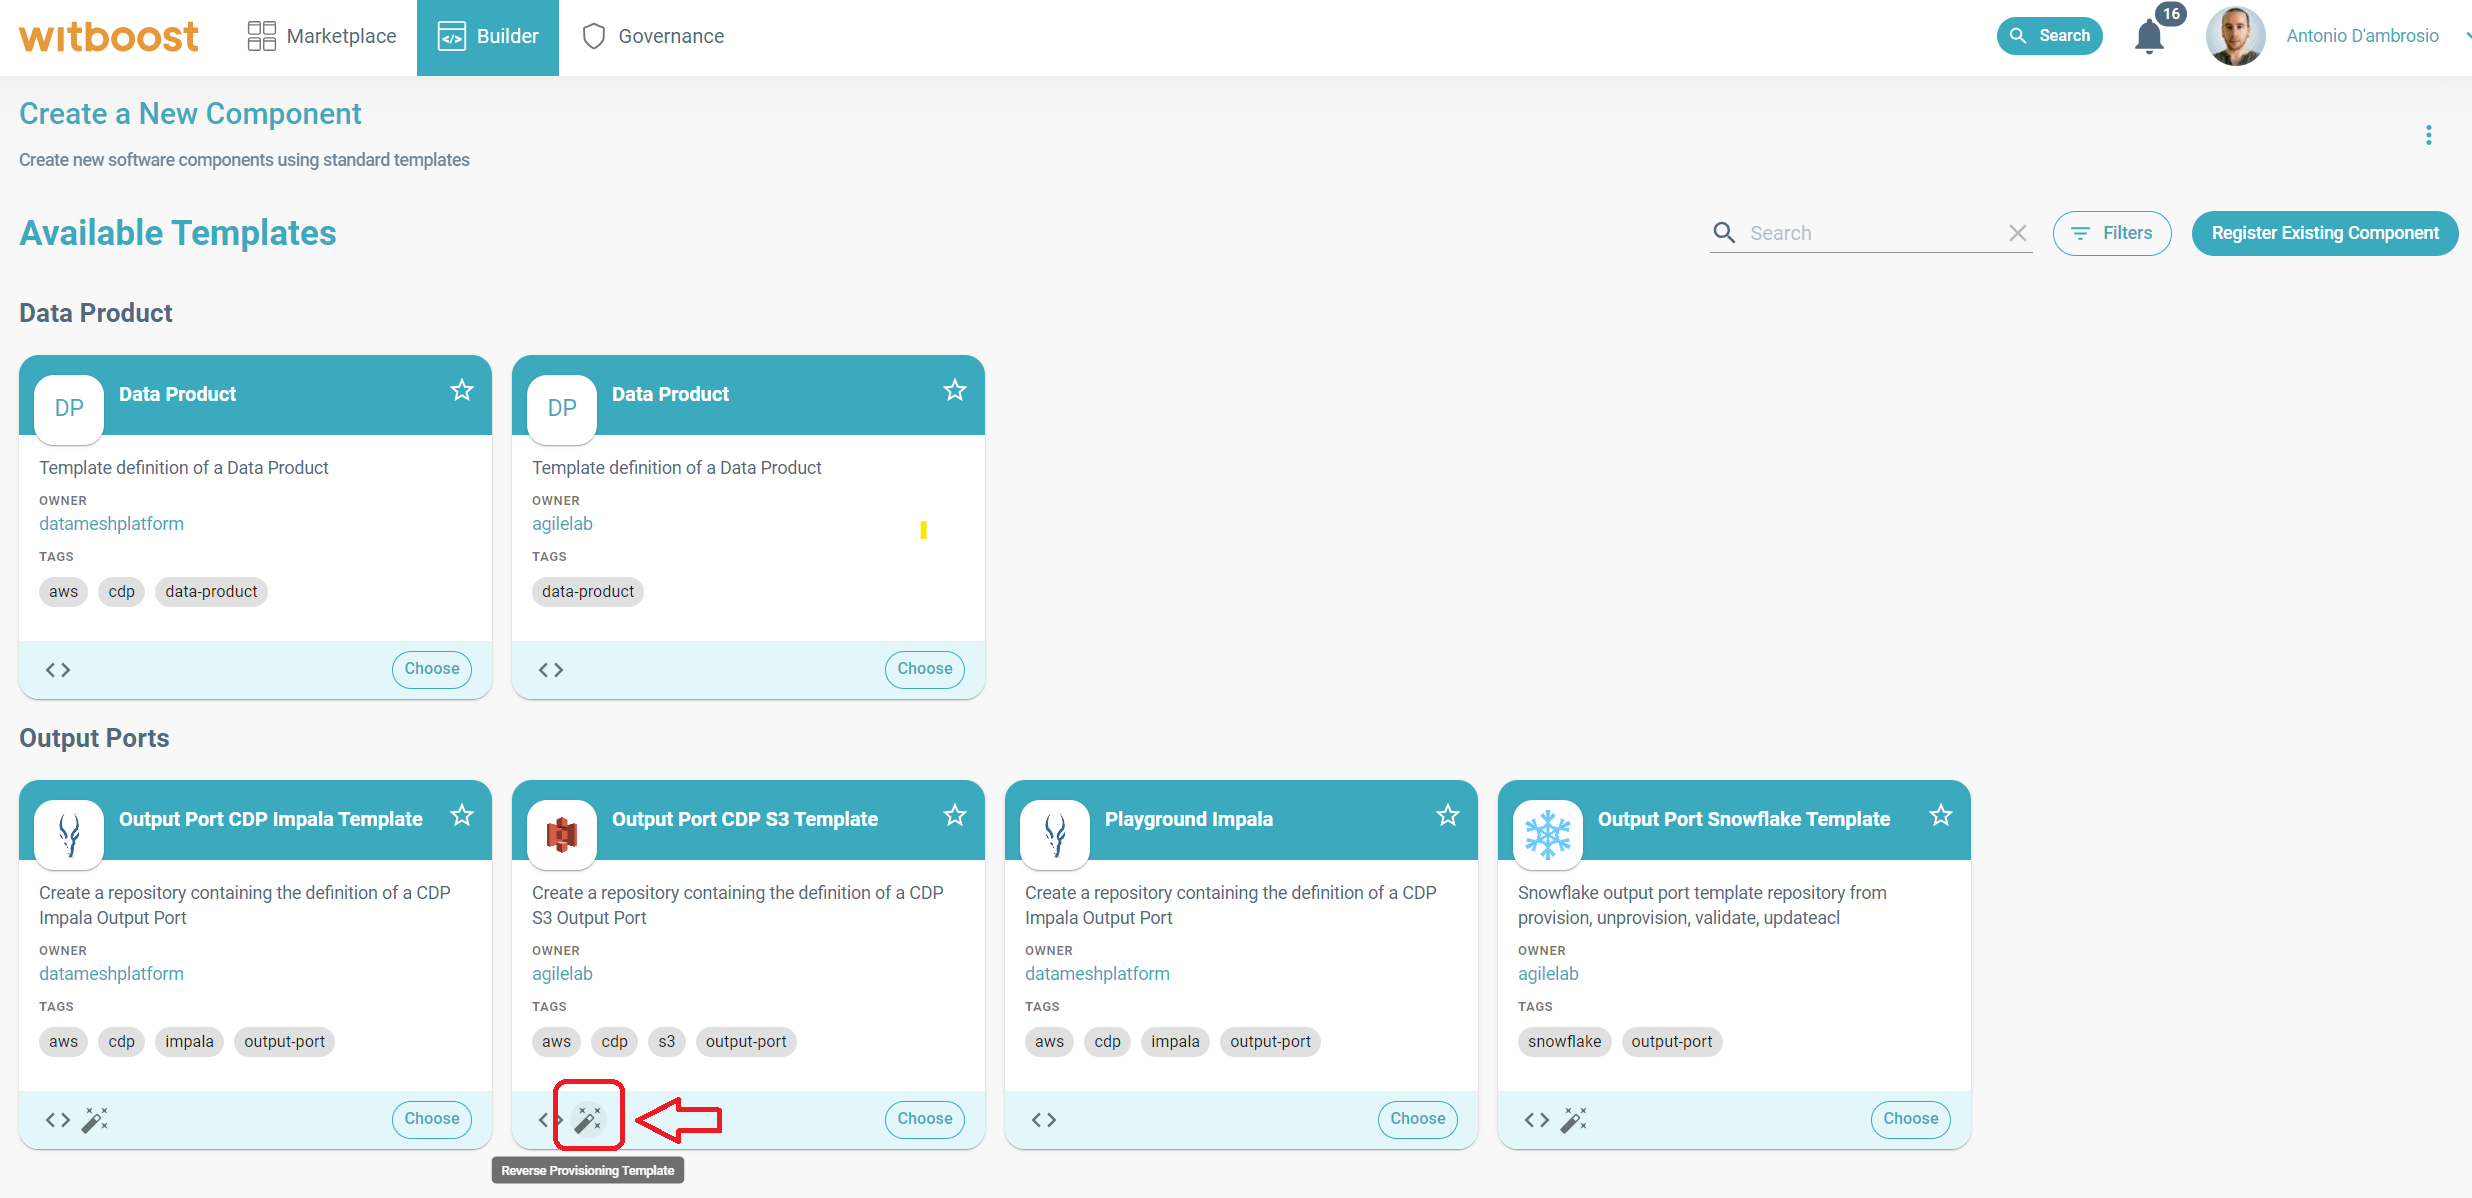
A magic wand icon on a use case template card in the templates list page (Builder > Templates), indicates that every component created starting from that use case template is suitable for the reverse provisioning operation.
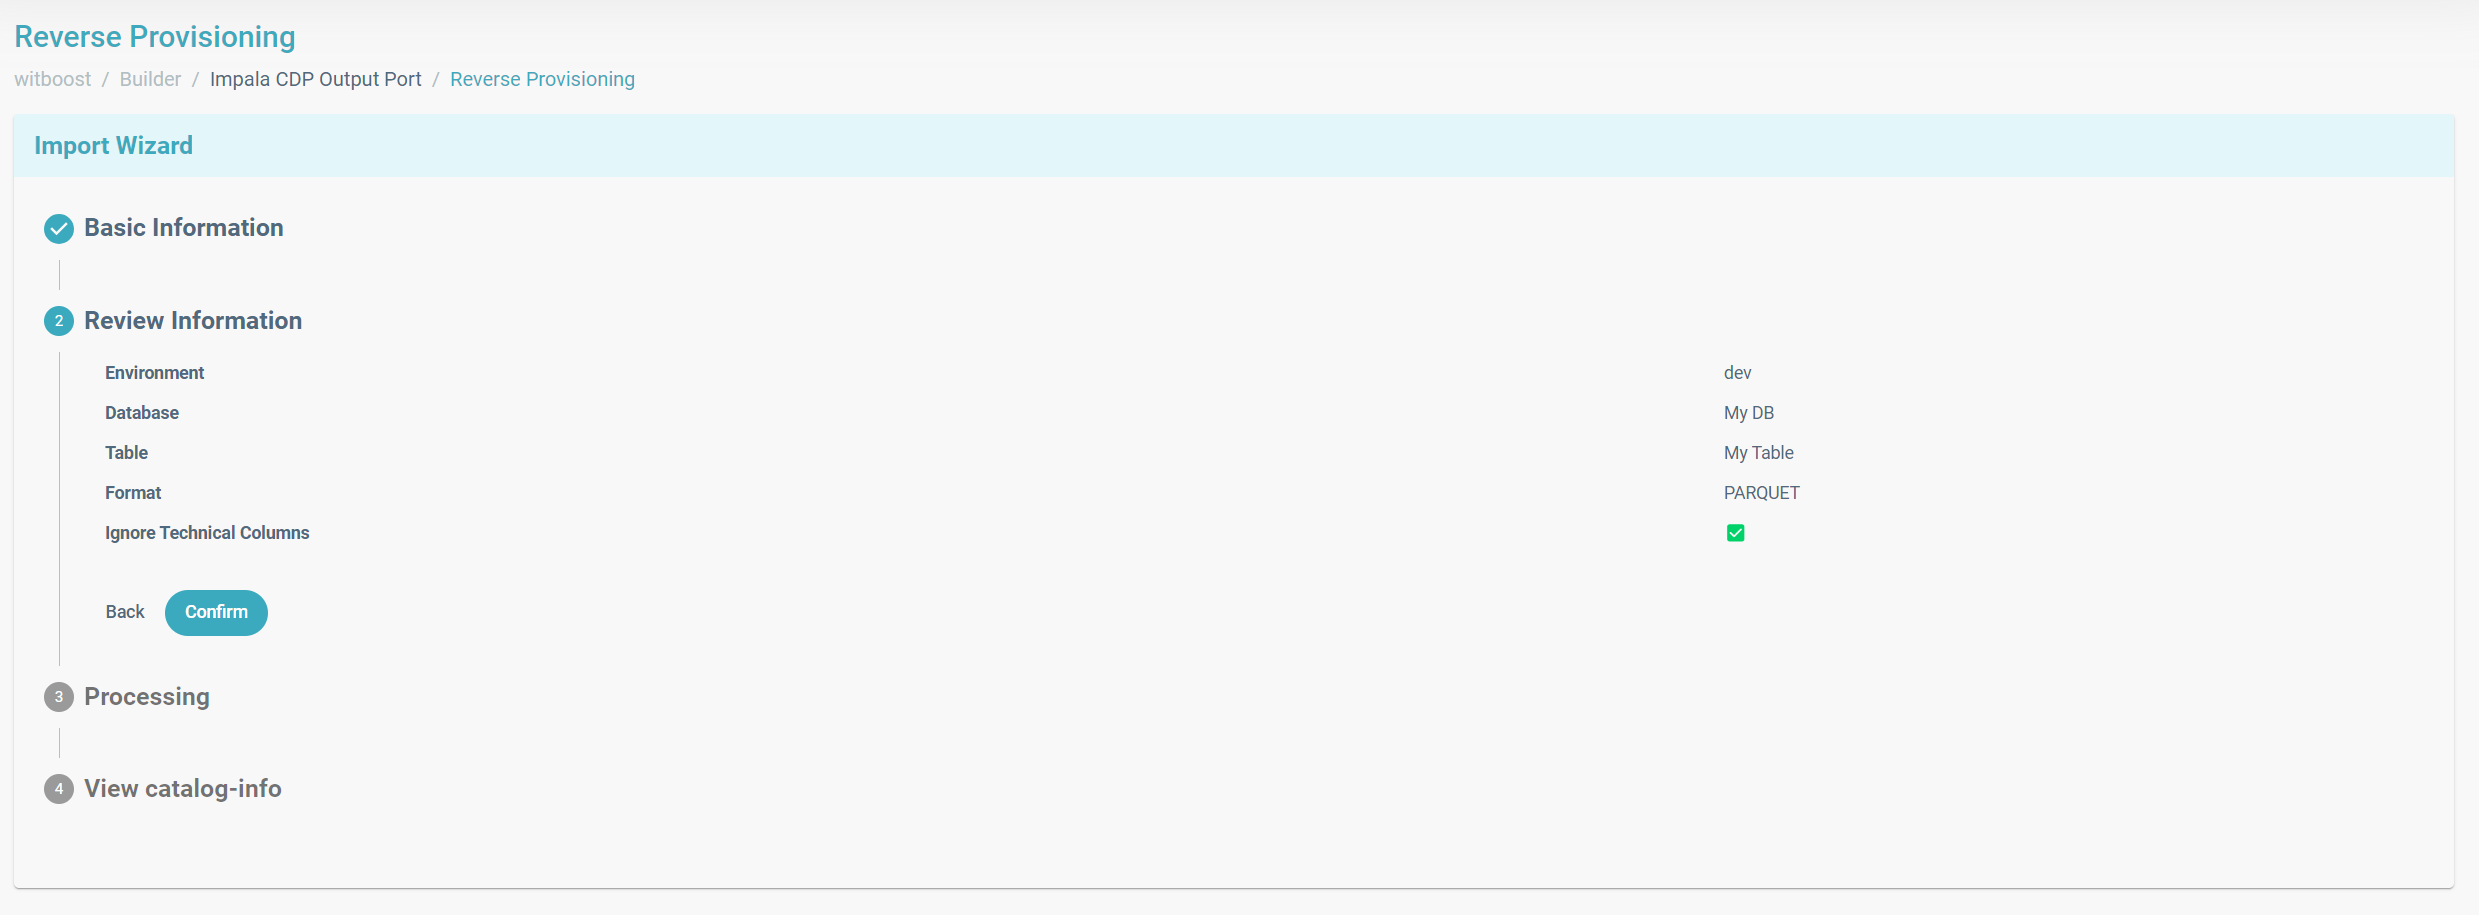
2. Provide and review the required information
The first step of the Import Wizard will ask you for some information the specific provisioners need to start the reverse provisioning workflow.

You can review them in the Review Information panel and start the process.
When you see an info icon on the right upper corner of the wizard and you click on it, a documentation page, describing the reverse provisioning operation on the current component (e.g. extended input descriptions, expected output, etc.), will open.

This kind of documentation is published and maintained by the Platform Team.
3. Start the reverse provisioning process
The Processing step will display the status of the reverse provisioning operation and its related logs.
After the process is complete you will find the available updates to the catalog-info.yaml, returned by the specific provisioners, in the last step of the wizard.
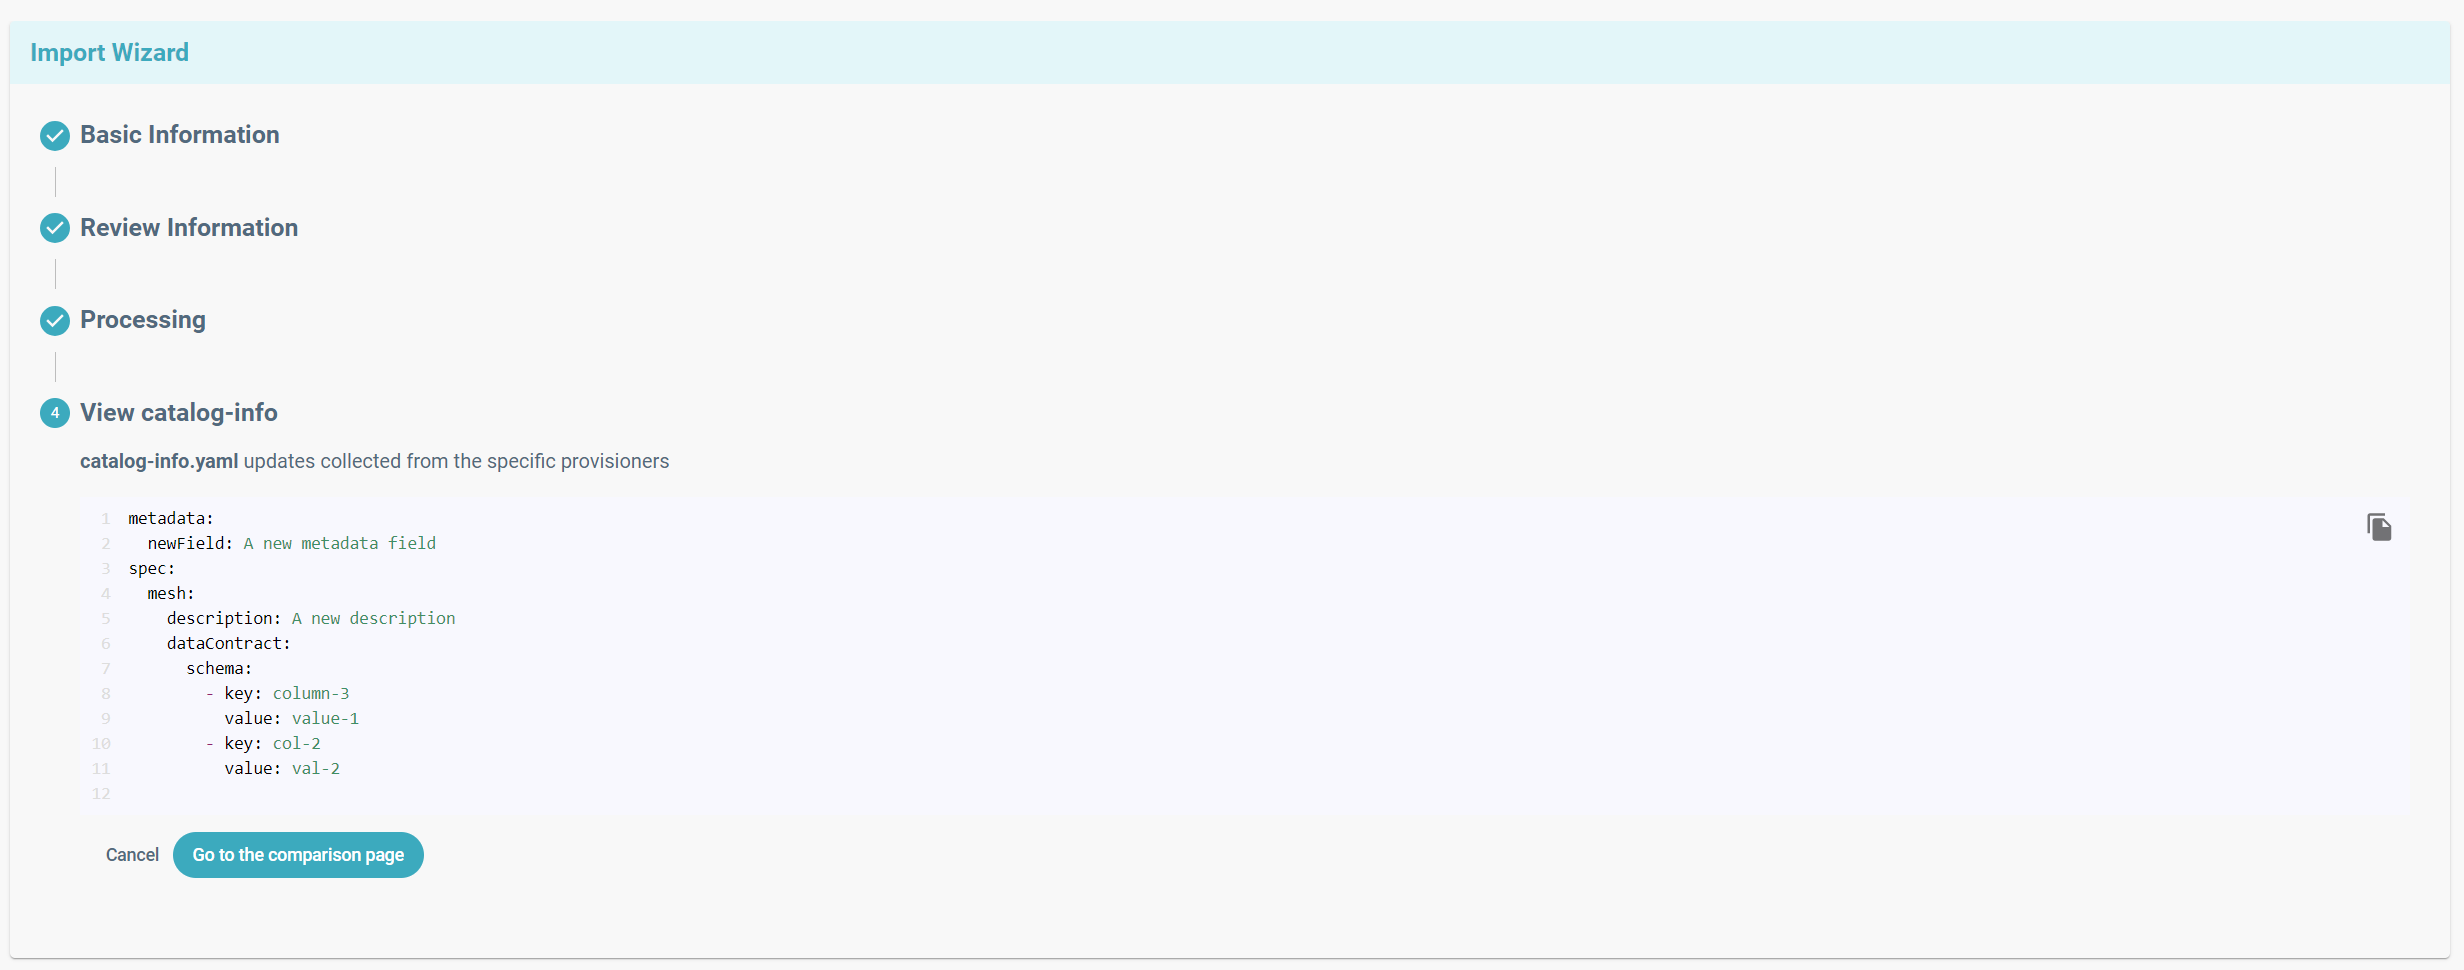
catalog-info.yaml updates will never be automatically applied without user intervention and confirmation. You can run the reverse provisioning operation multiple times safely without making any changes to the catalog-info.yaml file.
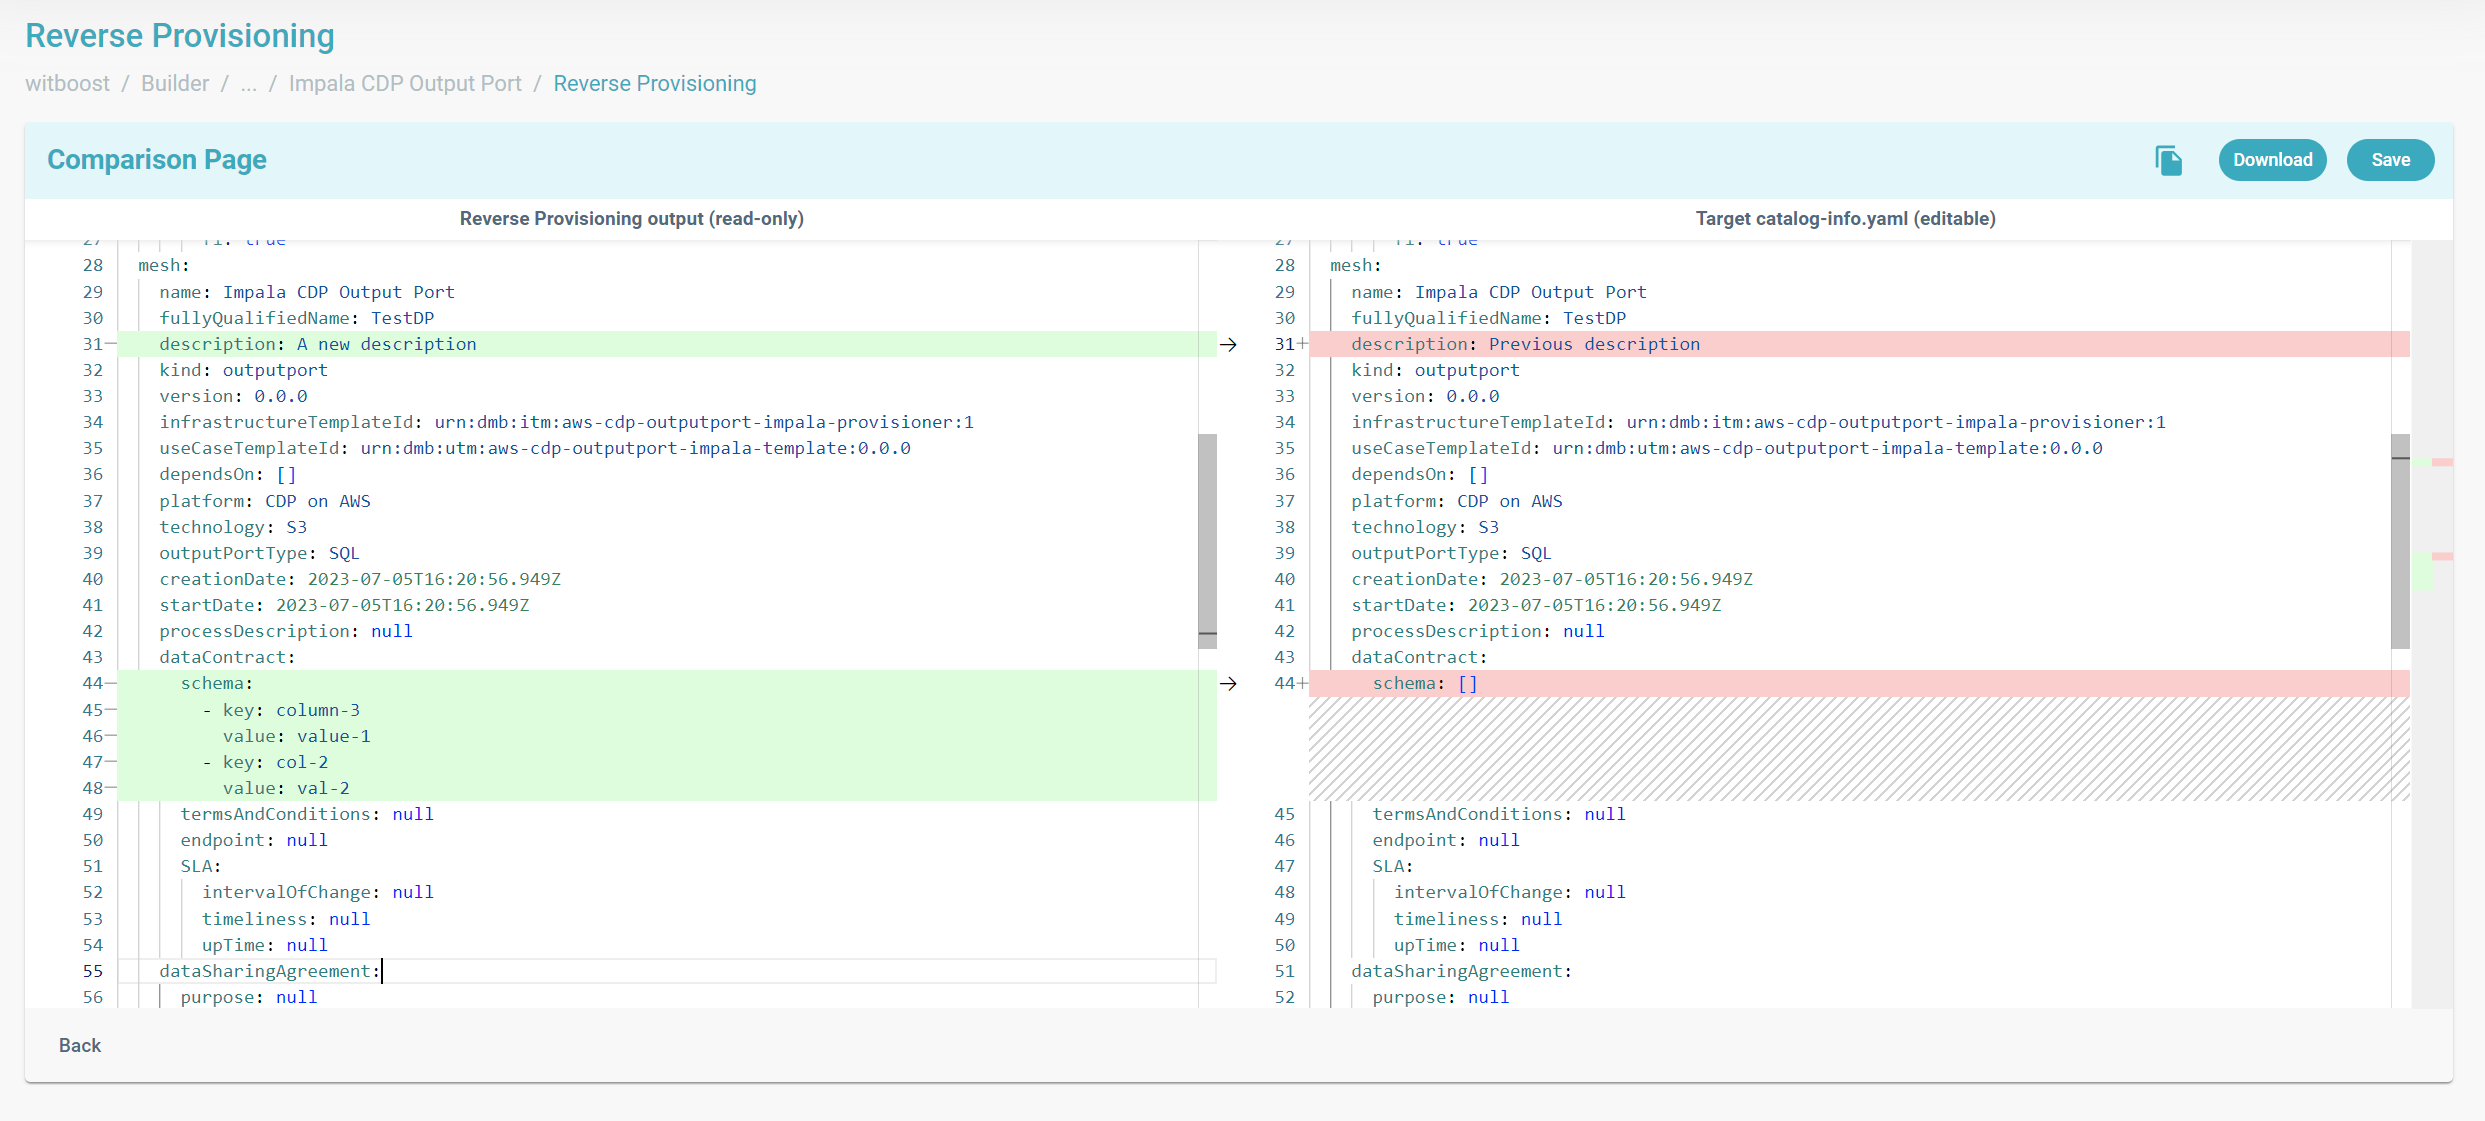
4. Compare and merge
The left panel of the Comparison Page will display the content of the catalog-info.yaml enriched with the new updates. The right panel shows the current persisted catalog-info.yaml and gives you the possibility to edit it by selectively picking updates from the left panel or by freely changing its content.
When you are happy with the resulting catalog-info.yaml (in the right panel) you can copy or download it and manually commit the new changes to the component's git repository. Alternatively, you can handle commit and push operations without leaving witboost by clicking on the Save button.
The witboost-manged saving mechanism allows you to automatically execute commit and push operations on the branch from which the component's catalog-info.yaml is read (its name is displayed in the saving dialog). If you need to push the updates on a different branch, you can proceed manually by copying (Copy icon) or downloading (Download button) the new catalog-info.yaml.