Create Data Products with Blueprints
Blueprints Introduction
There are several ways to create a data product, depending on the available templates and the needed components to fulfill your specific use case. To simplify this phase, we introduced the concept of Blueprints.
Blueprints are just templates for pre-defined use cases: they contain a data product template with already-built relationships to certain components that should be created along with it. It is a very powerful and useful mechanism that will speed up the creation of well-known use cases; just to make an example, let's say that in your development team, you usually create data products that read from a remote resource using Spark and create some output tables on Snowflake: you can now create a Blueprint containing the data product and the Spark and Snowflake templates together, to speed up the creation of new use cases. Let's take a step-by-step look at how to create a data product with Blueprints.
As per regular templates, to perform actions related to interacting with the repository (creating a new repository, committing/pushing some files, etc.), witboost requires you to have access to the repository manager where the repositories will be created. There are different ways witboost can be configured to achieve this, and one is to specify a token that you will use to interact with the git repository (if the token is not specified, an error message will notify you to configure it in your personal settings).
If this is how your installation is configured, please refer to Configuring Git Credentials page to set up your token.
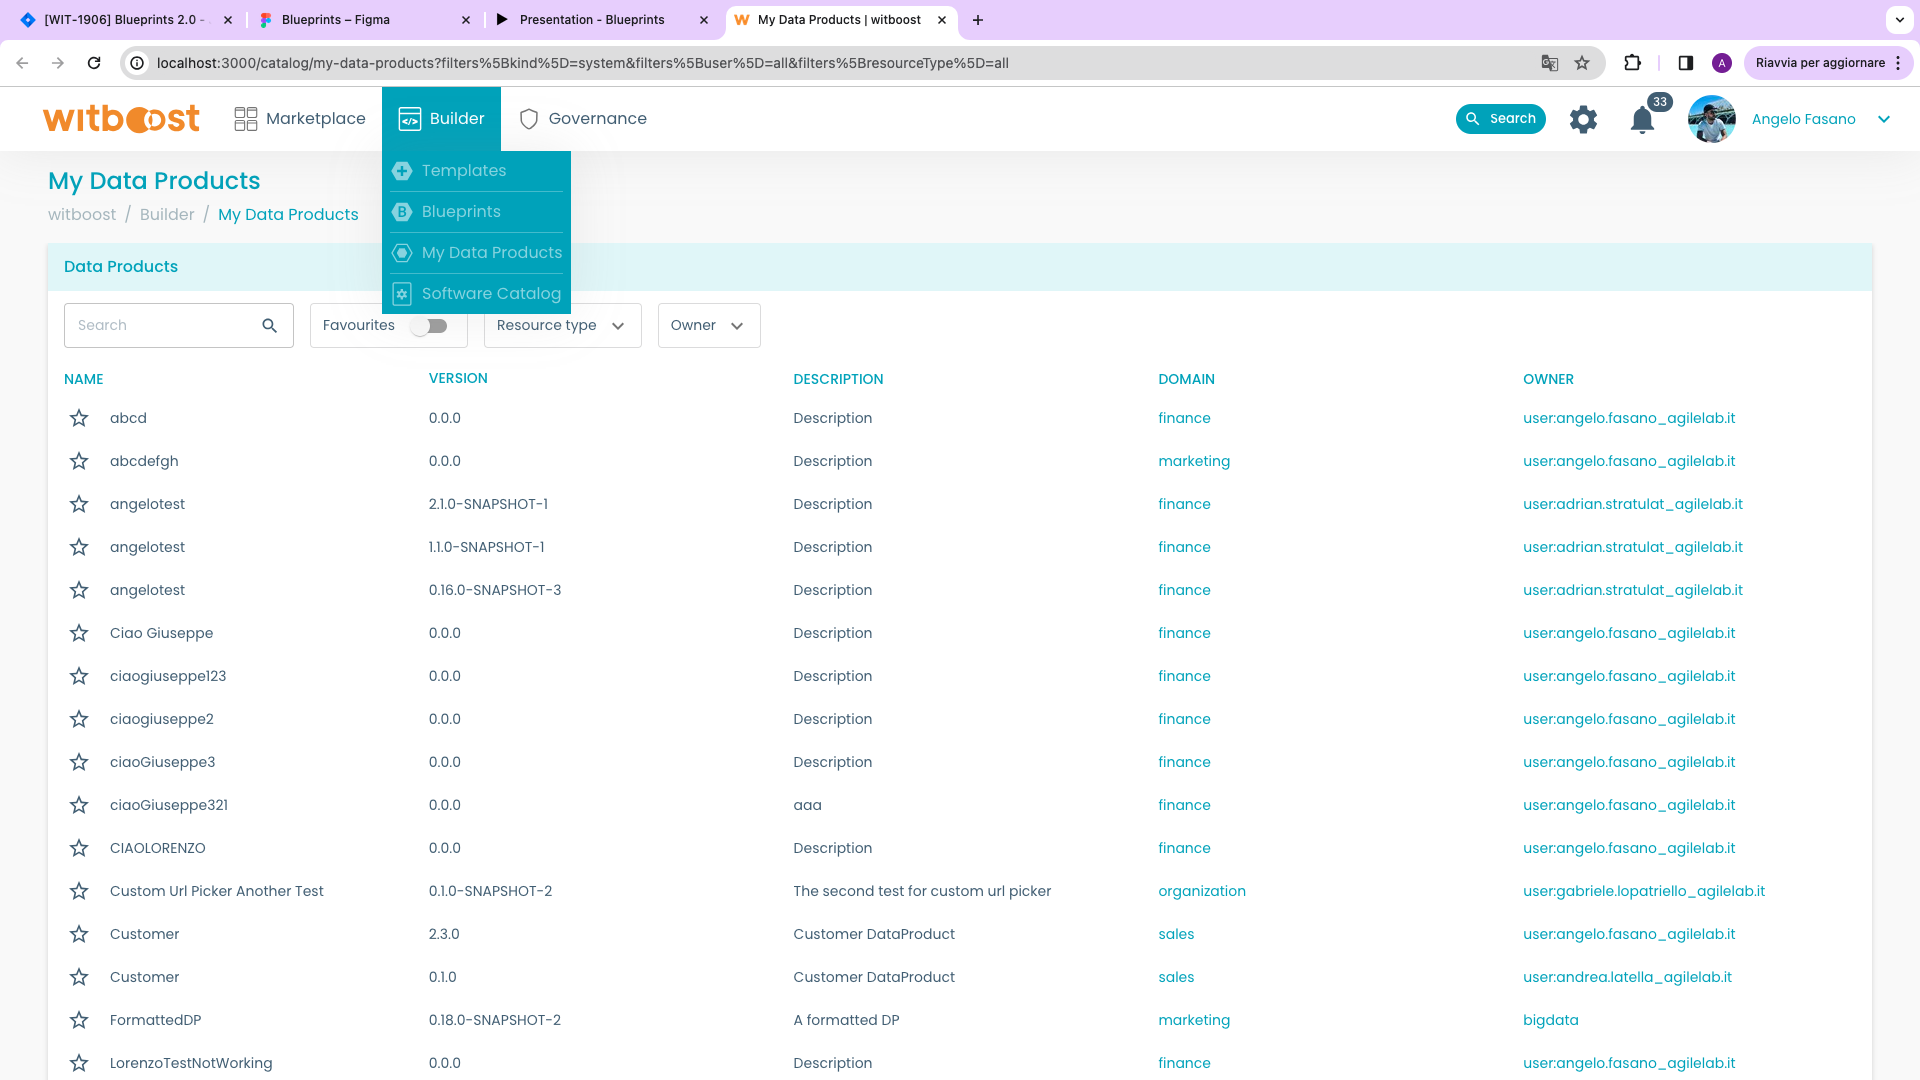
Creating data products using a Blueprint
- To create a data product using a Blueprint, at first, you must go to
Builderand selectBlueprintsfrom the drop-down menu.
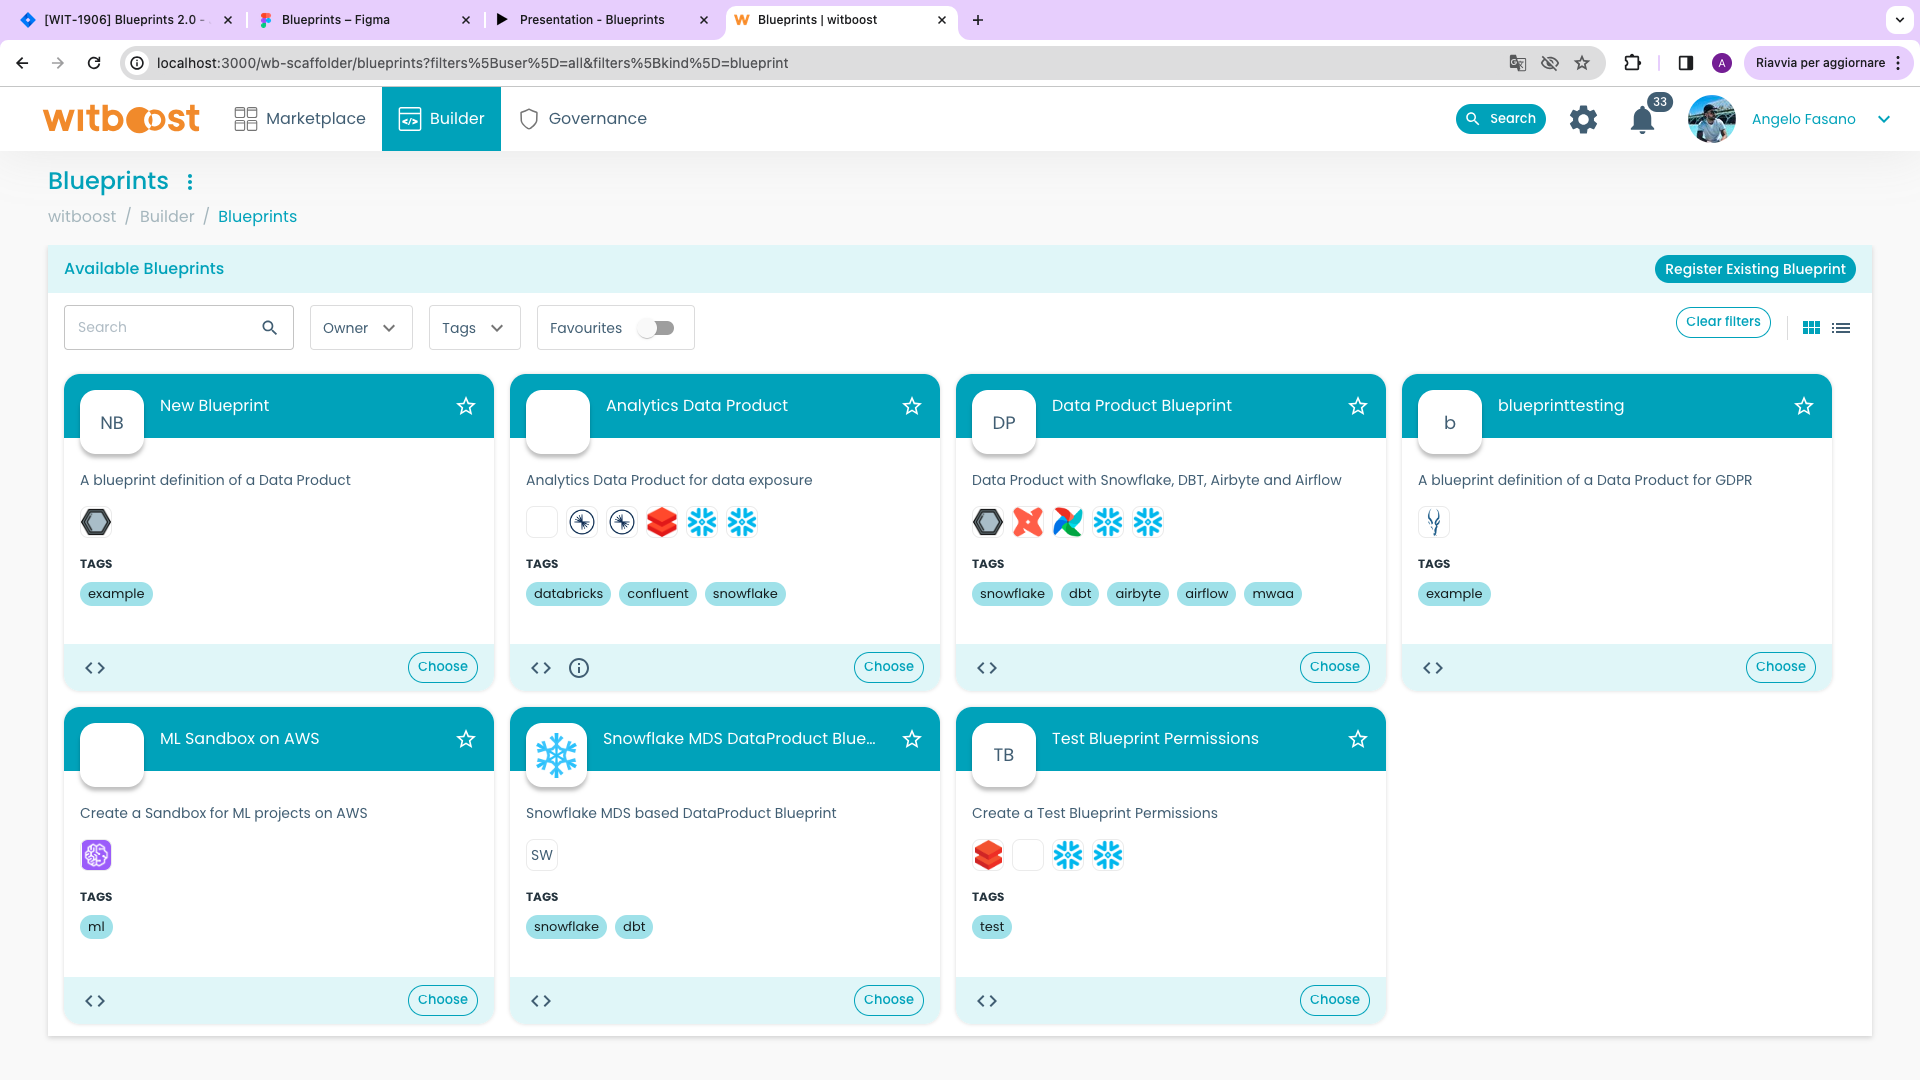
- A page with the available blueprints is displayed. Each blueprint card has a name, a short description, and some generic details. It also contains the data product template that this Blueprint will use, and which component templates will be proposed when using it. At the bottom of the template card, you can find two buttons: some angle brackets, and a
Selectbutton.
Clicking on the angle brackets will take you to the repository containing the definition of the blueprint (if you have access to it), and the Choose button will allow you to select this blueprint to use it. Let's select the Data Product Blueprint template by clicking the Choose button.
- A page with a table opens. On the left side, you can see the list of all the templates contained in the blueprint, and the right panel will be empty since it contains what we built so far with the selected blueprint (nothing yet). Also, note that there are two buttons:
Addon the right side of the data product row, andSelect Existing Data Productin the upper right corner of the table.
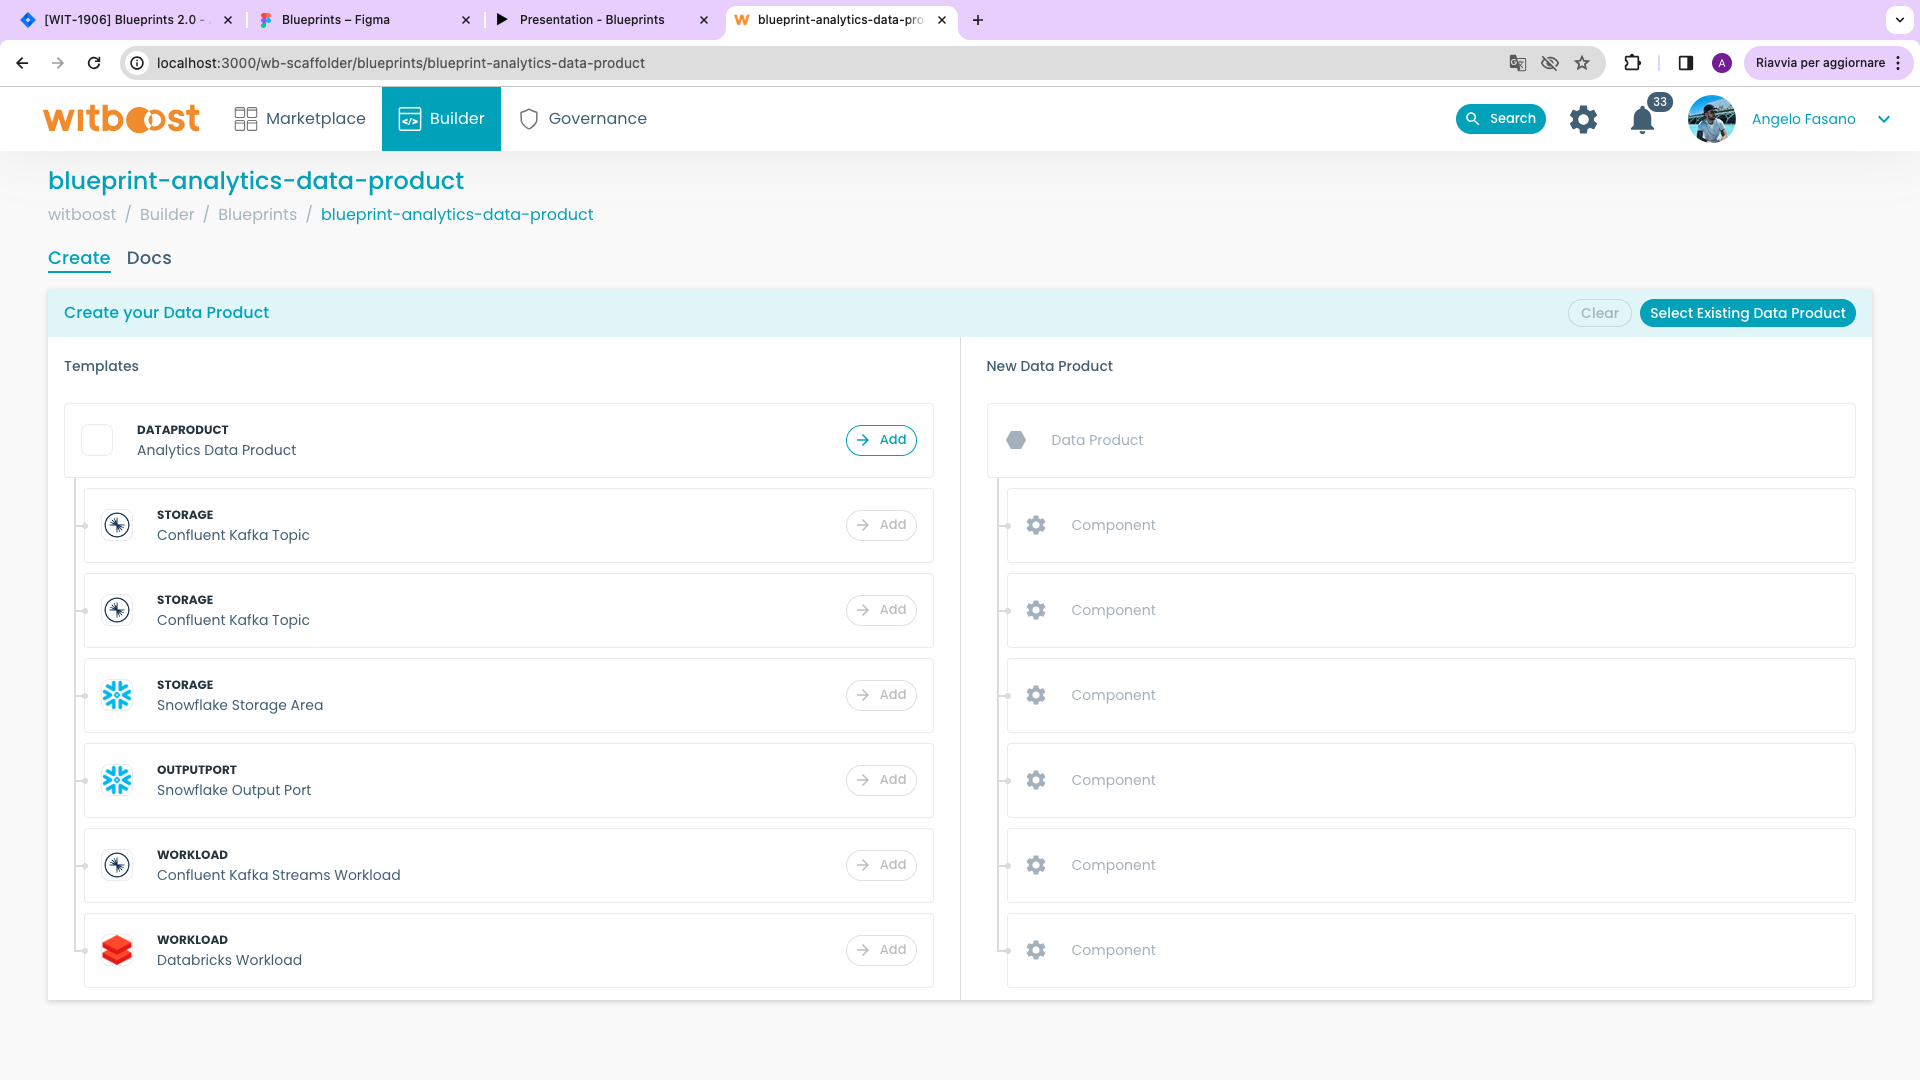
- Let's create a new data product, by clicking on the
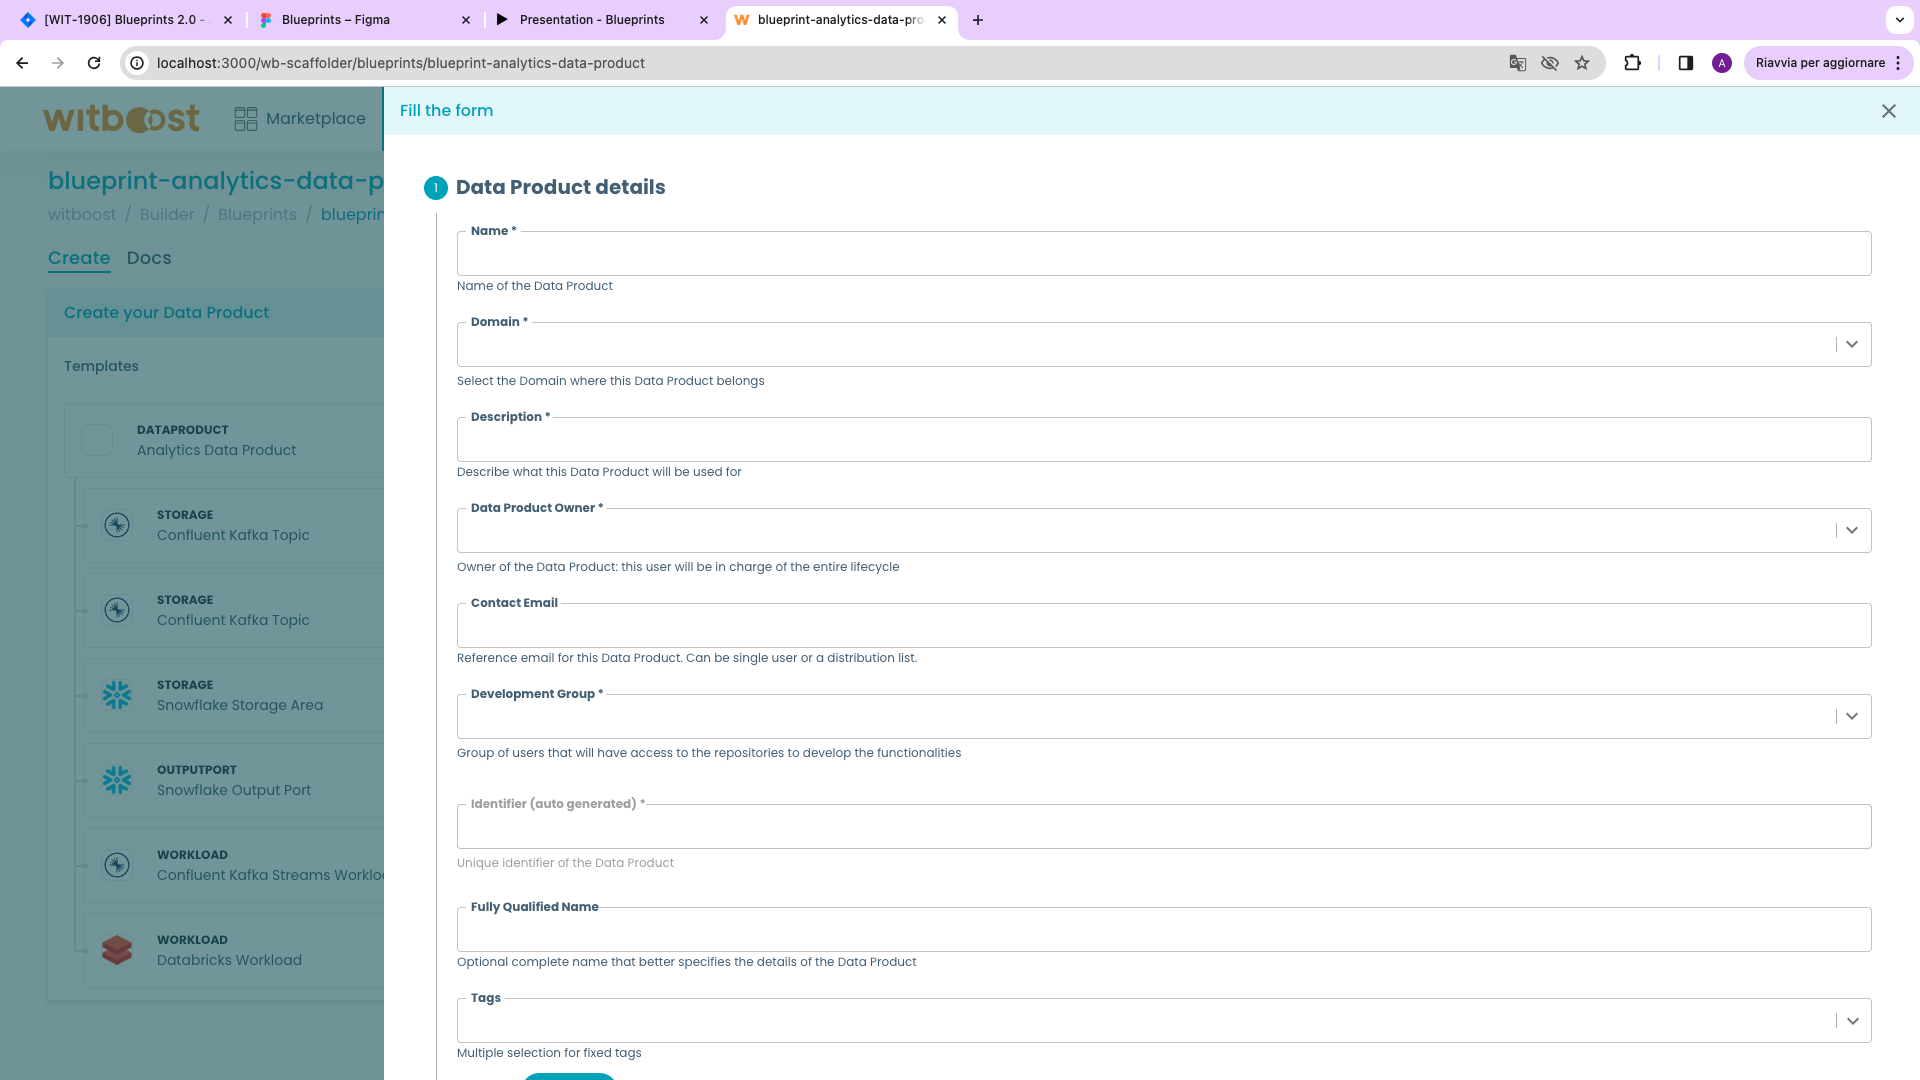
Addbutton in the data product's row. The creation menu will be shown on right drawer. Enter all the metadata you need (the fields are the same as when you normally create this data product from a template).
- At the end of the creation, you will see the three processes defined in the template (usually Fetch, Publish and Register), just like a normal creation. It can have three states:
- Loading, a
Loadinglabel will appear on the right pane - Error, a
Start Overbutton will appear allowing to restart the process, andErrorlabel will appear on the right pane - Finished, the data product you created will appear in the right pane with a green check mark. This means that this data product is currently selected and that you can add other components to it. At the same time, the
Addbutton opposite the components becomes active if they have not yet been added.
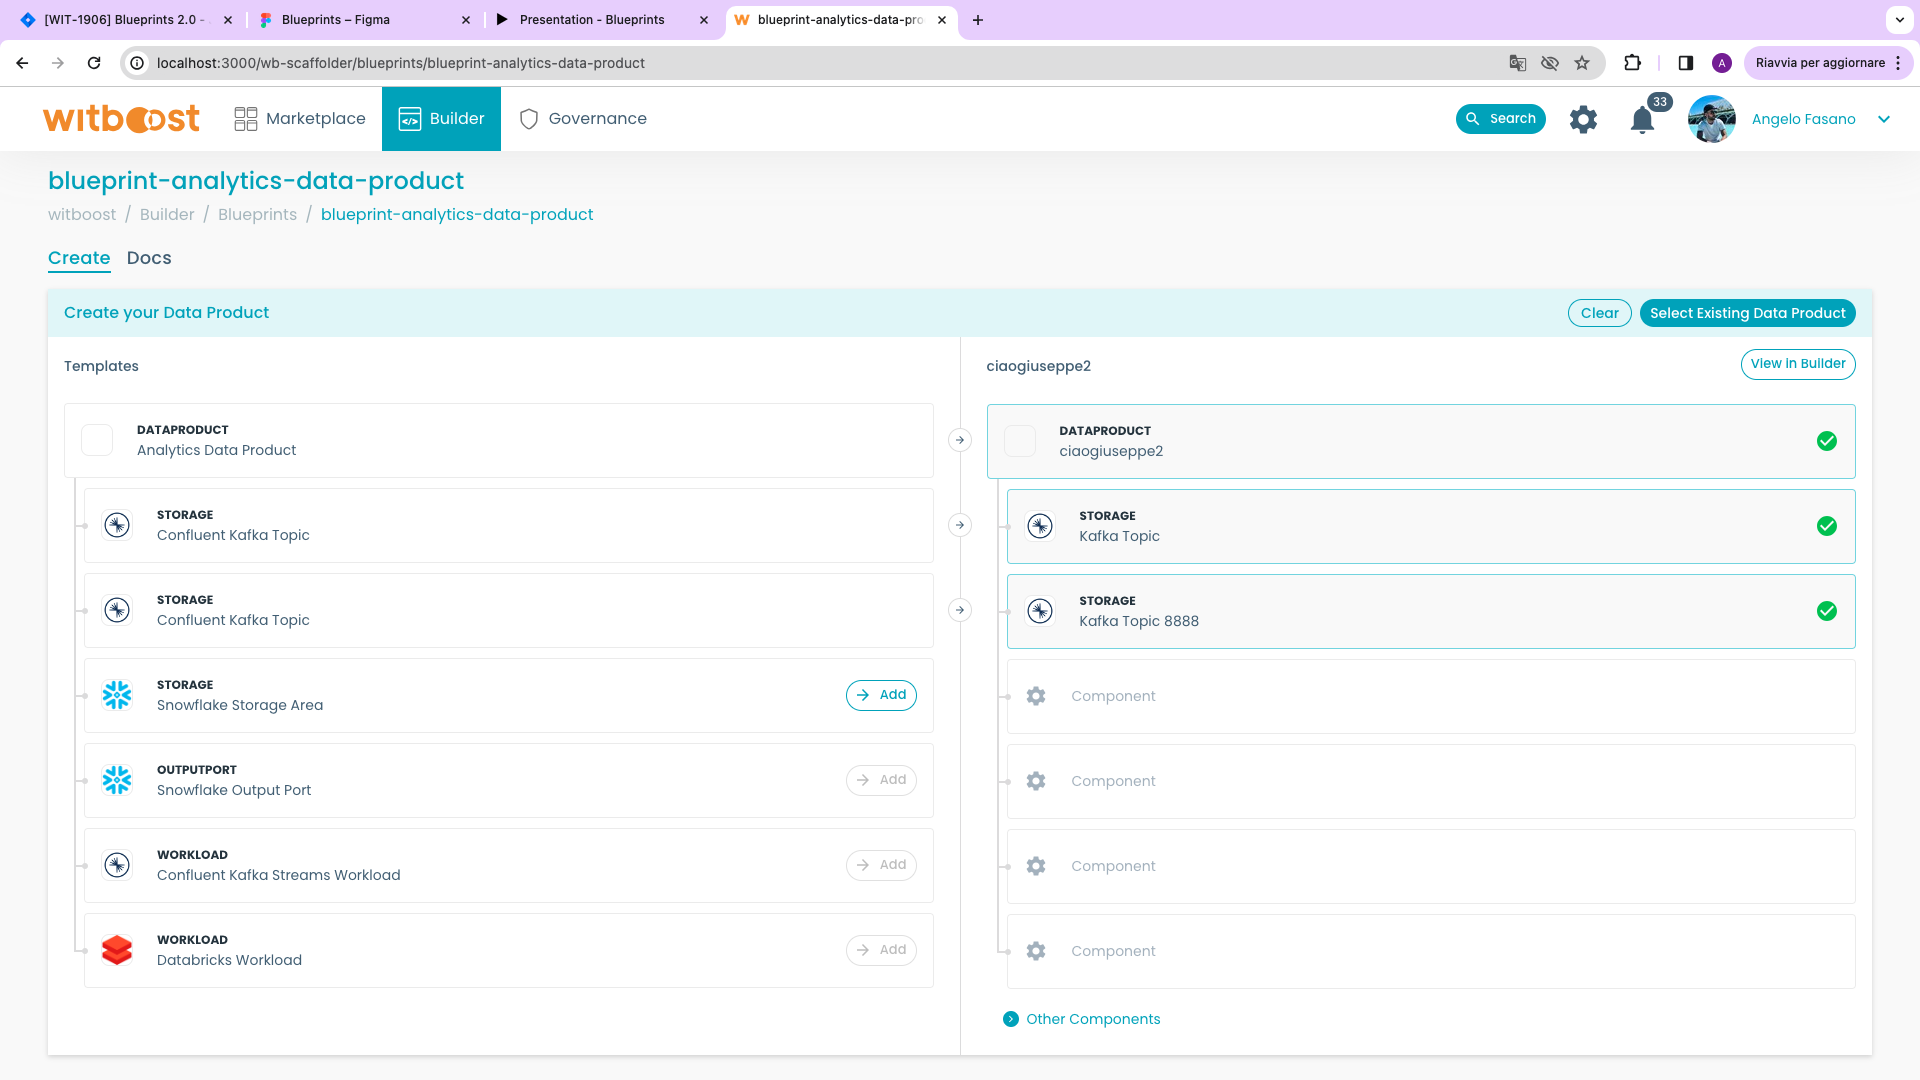
- Click the
Addbutton next to the "Snowflake" output port and, as in the previous step for the data product, a menu will be shown below to add the component to the data product. Fill again all the necessary fields and complete the component creation.
At this stage, while inside the wizard, it is important to link components to the newly created data product, specifying its name when filling out the component form.
Modifying an existing data product with Blueprints
If you have already some data products that were created before you defined your blueprint, you can also check if the existing data products are compliant with the blueprint you defined. This means that you can check if one of your data products contains all the components as defined in the blueprint, and in case it is missing some of them, simply add the missing ones to it. In this way, you can check that all the data products relative to one use case are defined in the same way (you can also enforce this behavior at deployment time by adding a policy that checks the presence of all the needed components).
When selecting an existing data product to check its compliance:
-
You can add new components to an existing data product using the Blueprint. To do this, go to
Builder -> Blueprintsas you do when you want to create a new product with the Blueprint. There you will see the familiar table with products and components on the left and empty rows on the right. In the upper right corner you will find theSelect Existing Data Productbutton - click it. -
A panel with a list of existing data products appears. You can use the search to find the desired data product. Click on the desired data product to set the radio button on the left and click the
Selectbutton on the bottom to select it.
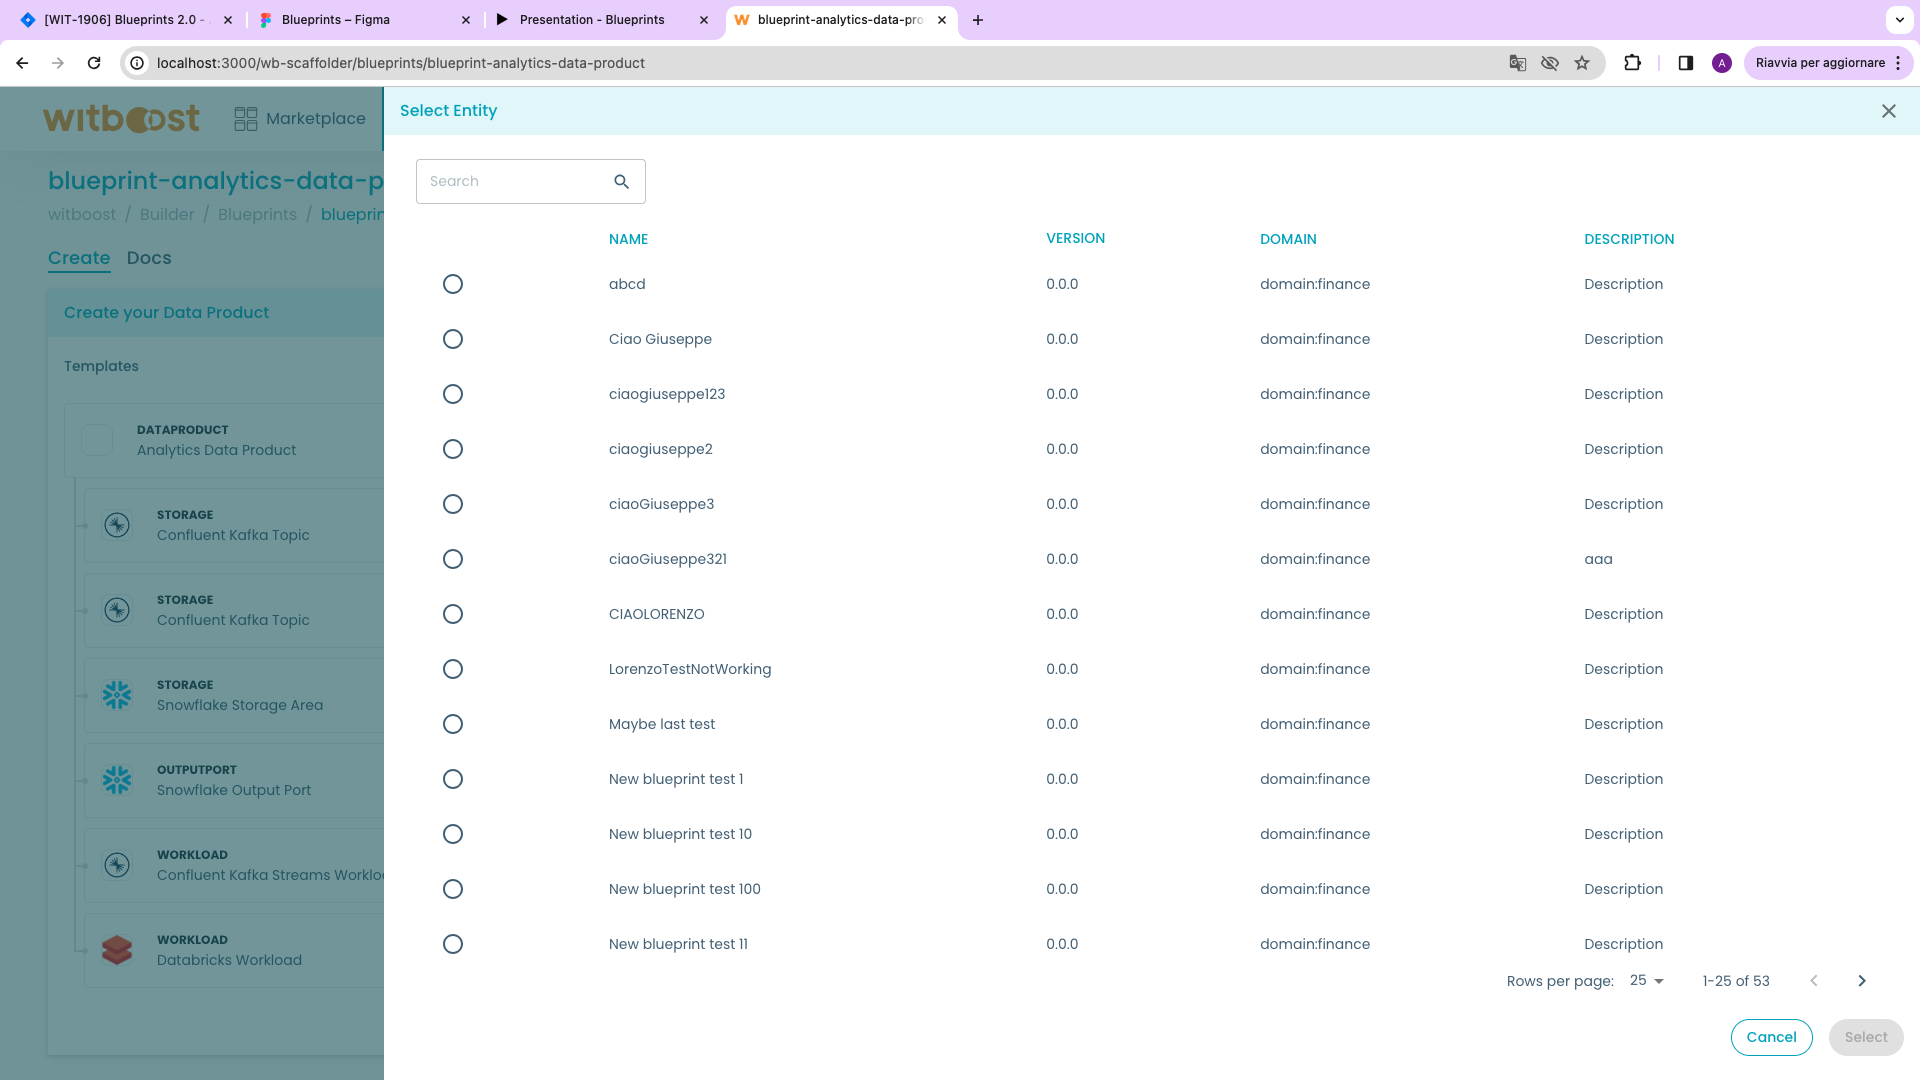
The search panel will show only data products that were created from the template defined as "main data product template" in the blueprint, to ensure that you can't add wrong components to existing data products that are not compliant with the blueprint definition.
- You will now see that the name of the selected data product appears in the right pane with a green check mark - this means that you have successfully selected the data product. Now you can see which components are already contained in it and which are not, and add new ones at your discretion. In this way, you can check and modify your data products according to the available Blueprint templates.